HOW TO INSTALL NCY 6.5” STRETCH
Credit for this goes to sanjuro62 and Doctavius. It is a cut and paste of the original TR post in order to try and retain the old technical content. If anyone knows sanjuro62 or Doctavius, tell these Rucker’s to come and claim their post!
Okay, this is one heinous install, but very much worth it:
Before installation make sure the bolts that hold the yellow bushing in place are flush to the extension kit arms. You’re going to have to torque them down a bit.
I flipped the frame upside down and positioned everything in the picture below. Make sure you put a metal/rubber protective sandwich against the outer frame (where the frame bushing is located). Tighten the c-clamp enough to push the frame bushing outward. Only do enough to allow you to slide the extension arms in place.
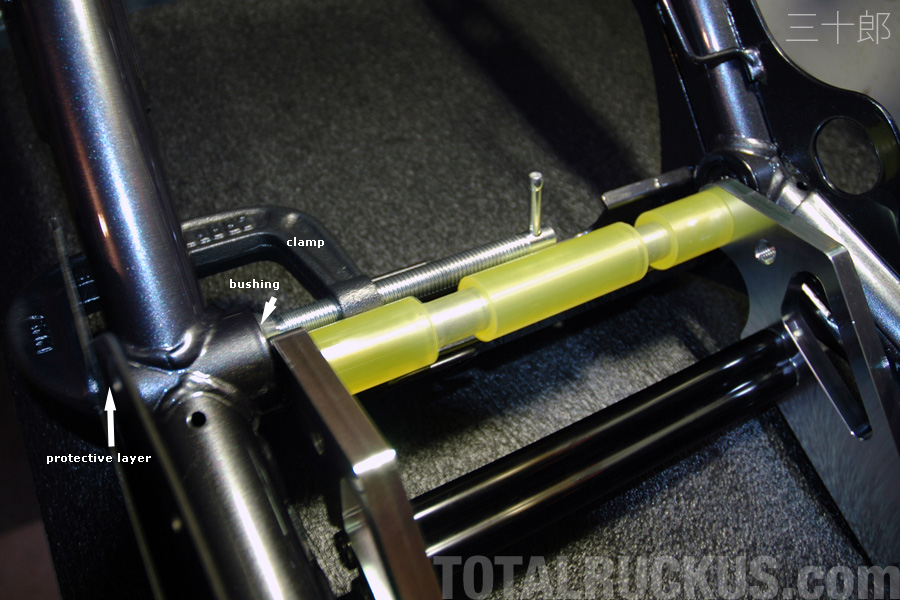
Once you have the extension kit in place you will discover that the bolt holes for the frame bolts will not line up. The remedy is to take two c-clamps and torque the yellow bushing down until the holes line up. Do both sides as evenly as possible.

Once everything is lined up and the frame bolts are installed the bushing should be look as pictured below.

Now if you haven’t damaged anything or pulled your hair out of frustration, then your frame with the extension kit should look like this:

Note: The rear shock extension mount should first be attached to the top of the shock absorber and torqued down. Then the two pieces should be bolted to the frame. I’ve found that the NCY supplied bolt is hard to get to via an allen socket key because the rear frame obscures part of the tool path.
varroa EDIT: NCY extension bracket is known to cause deviation in vertical axis of the wheel from the original position (as in, your rear wheel might be slightly tilted to the left). To fix it, or attempt to fix it, follow this link: http://totalruckus.com/phpBB2/viewtopic.php?t=23428
So I don’t know if I am the only one that has noticed that the claw doesn’t fit right on our frames???.. The weld on the nut side of the shock mount stops the claw from seating properly on the frame and allowing for the design to work correctly. I tested how it fit on the other side with the bolt sticking ot and it became blazingly clear what had to be done… So I went and grabbed my angle grinder and voila!!! It fit just great and offers a lower profile look than others have been acheiving with this frame extension. Final pics to come I am fucking exhuasted and my back is killing me!!! Here are some pics to ponder…
Here you can see the weld I am talking about…

This shows how the "Claw should fit against the frame rail…

The angle and amount of material removed here is perfect!!!

Then a little emery paper to clean it up…
