HOW TO INSTALL R6 TAIL LIGHT
Credit for this goes to drowsports. It is a cut and paste of the original TR post in order to try and retain the old technical content. If anyone knows drowsports, tell this Rucker to come and claim their post!
DROWsports Ruckus R6 Tail Light Installation Guide
DROWsports Honda Ruckus R6 Sequential LED Tail Light: purhase here
Installation Time: 1-2 Hours
• Drilling and Wiring required
Tools you need:
• Drill Driver
• 1/8” Drill Bit
• 10mm Socket and ratchet
• 5mm Standard Hex Key
• Wire Stripper & Crimper
• Phillips Screwdriver
• Black Electrical Tape
DROWsports R6 Tail Light Included:
R6 Tail Light with integrated turn signals.
DROWsports R6 Tail Light Bracket
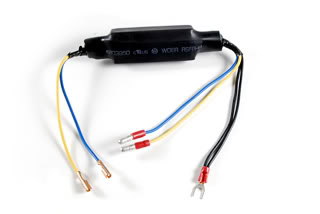
Resistor Pack
2 M6 Stainless Steel Bolts
2 M6 Stainless Steel Washer
2 M6 Lock Washer
2 M6 Flange Nut
3 Pan Head Screws, Bracket Mounting
9 Male Crimp-on Bullet Connectors
1 Spade Crimp-on Terminals
-
Remove the seat frame from the rear frame.
-
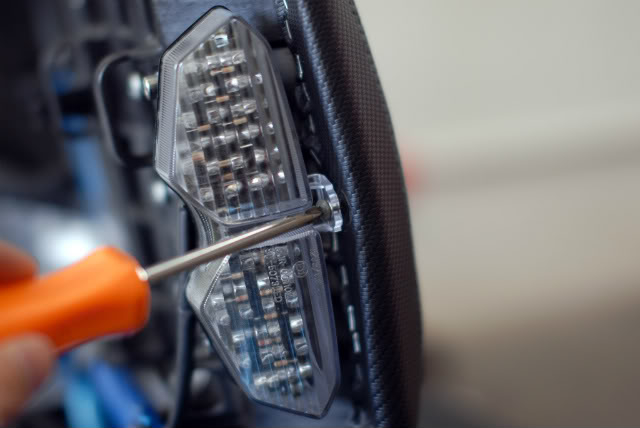
Mount the R6 LED Tail Light on to the DROWsports R6 Tail Light Bracket using the two M6 Stainless Steel Bolts.
-
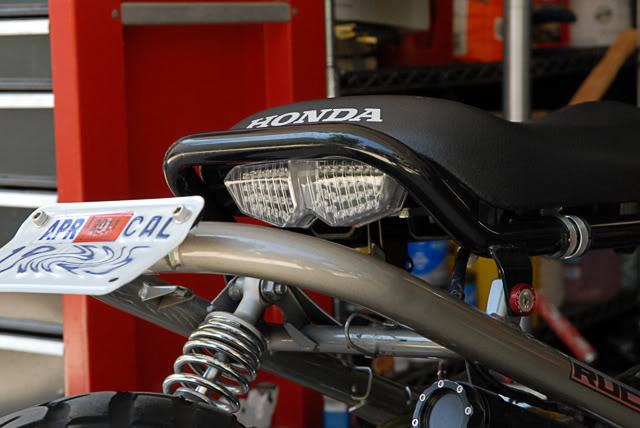
Place the Ruckus R6 Tail Light on the seat and center it.
-
Using the bracket as a template mark the three holes on the seat.
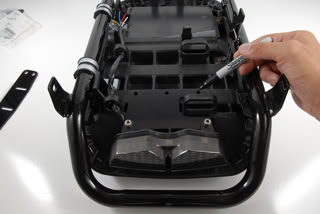
- Drill three 1/8” pilot holes for the mounting screws. Please take your time and do this right, if hole are not center or spaced out right it will be difficult to fix.
-
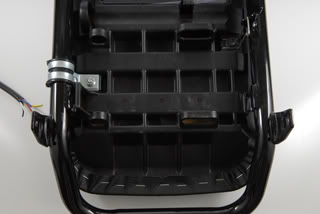
Mount the tail light on to the seat using the three mounting screws.
-
Install the Ruckus seat frame back on. (looking for a lower ruckus seat frame?) link
-
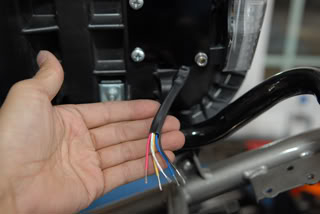
Route and test fit the wiring and cutoff extra wire length from the tail light.
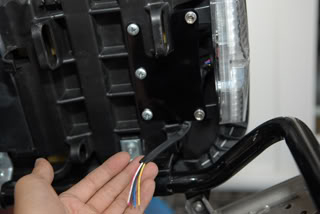
- Install the Male Crimp-on Bullet Connectors on the tail light.
a. Strip off ½ of the wire insulation.
b. Twist and fold each wire to make it thicker.
c. Crimp each wire.
- Plug the Ruckus Tail Light into the Ruckus Tail Light Harness.
• Ruckus Light Blue = Blue Tail Light
• Ruckus Orange = Yellow Tail Light
• Ruckus Green/Yellow = White Tail Light
• Ruckus Green/Black = Black Tail Light
• Ruckus Black Brown = Red Tail Light

- Install the Crimp-on Connectors to the Resistor Pack
a. Male Connectors on the side with four wires
b. Spade Terminal Crimp-on the black ground wires. (Joint the two black wires together)
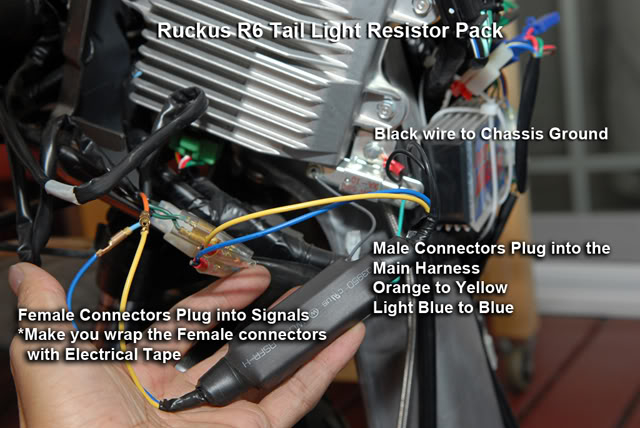
- Plug the Resistor Pack to the Ruckus Wire Harness in the Battery Box.(the resistor pack is a sub-harness that plugs in between the front signals and the main harness)
a. Male Connector plugs into the Main Harness.
b. Spade Terminal hooks into a ground on the chassis.
c. Female Connectors plugs to the front turn signals. Be sure to tape up the female connectors with Black Electrical Tape.
- Test and make sure all the brakes and turn signal works before putting everything back.
Ruckus R6 Tail Light Wiring. (sequential lights only)
• Ruckus Light Blue = Blue Tail Light = Left Turn Signal
• Ruckus Orange = Yellow Tail Light = Right Turn Signal
• Ruckus Green/Yellow = White Tail Light = Brake Light
• Ruckus Green/Black = Black Tail Light = Ground
• Ruckus Black/Brown = Red Tail Light = Power
Resistor Pack:
Black to Ground
Optional Parts:
DROWsports License Plate Bracket
LED License Plate Bolts
NOTE: We highly recommend installing a third a screw in the center of the light to keep the tabs from breaking.